Welcome to our Arduino tutorial for kids! In this tutorial, we will show you how to have fun with an Arduino board and create some simple projects.
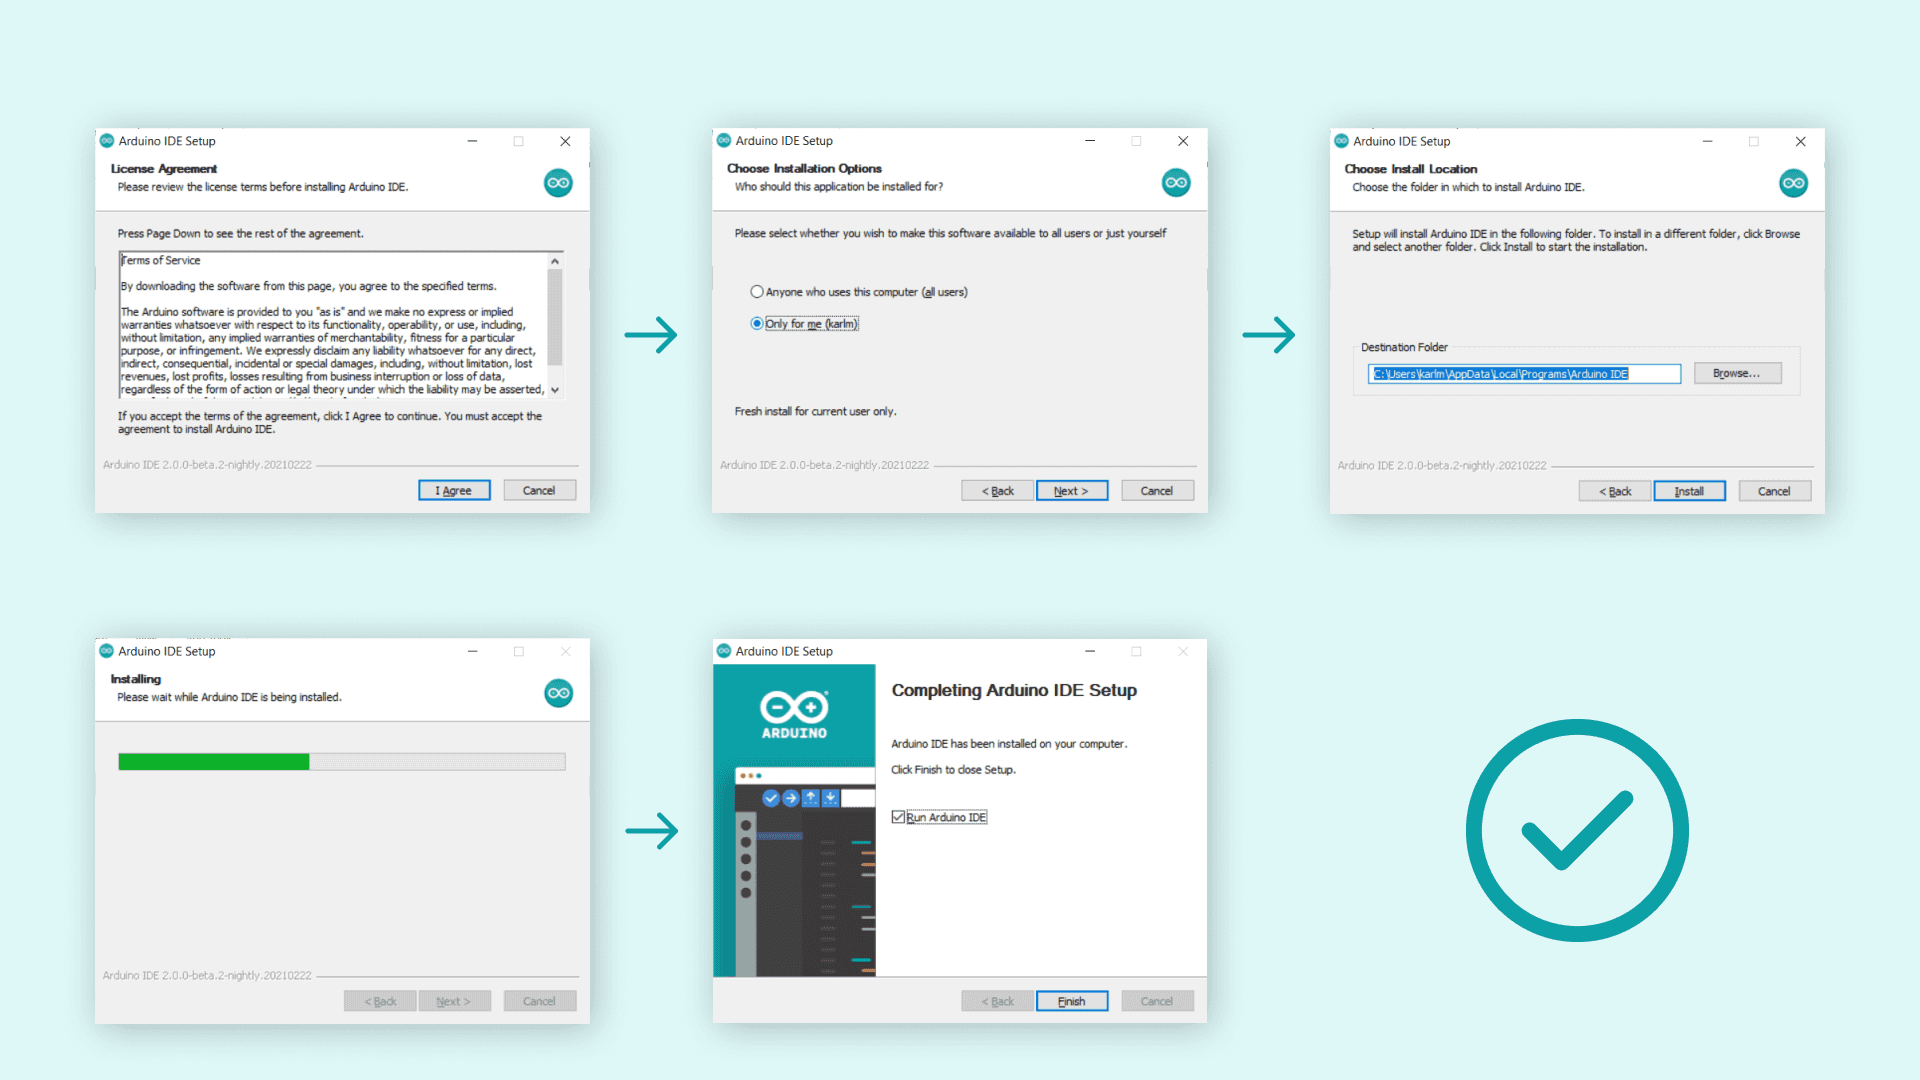
Step 1: Install the Arduino IDE
Before we can start using an Arduino, we need to install some special software on our computer. This software is called the Arduino Integrated Development Environment ( IDE). You can download at https://www.arduino.cc/en/software It will help us write code for our Arduino and make it do cool things.
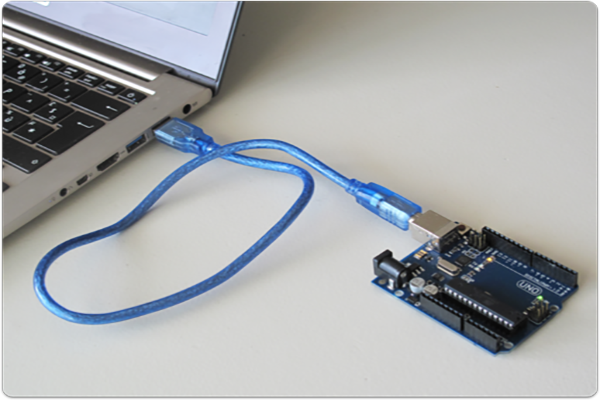
Step 2: Connect your Arduino
Now it's time to connect our Arduino to the computer. We'll use a special cable called a USB cable to do this. Just plug one end into the computer and the other end into the Arduino. Then, we'll open the Arduino IDE and choose the right port and board from the Tools menu.
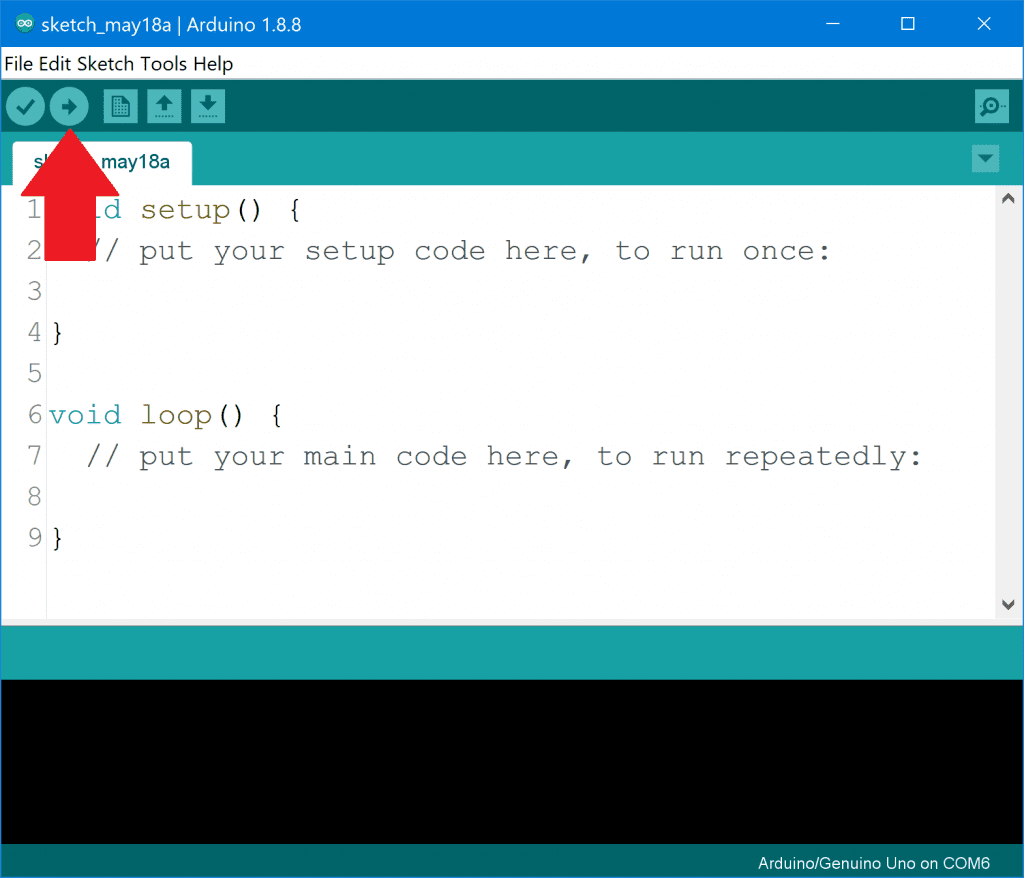
Step 3: Write and upload your code
Now for the fun part: writing code! We'll use the Arduino IDE to write our code in a language called C. Don't worry, it's not too hard. The Arduino library has lots of helpful functions that make it easy to control things like lights and motors. When we're ready to try out our code, we'll use the Upload button in the Arduino IDE to send it to the board.
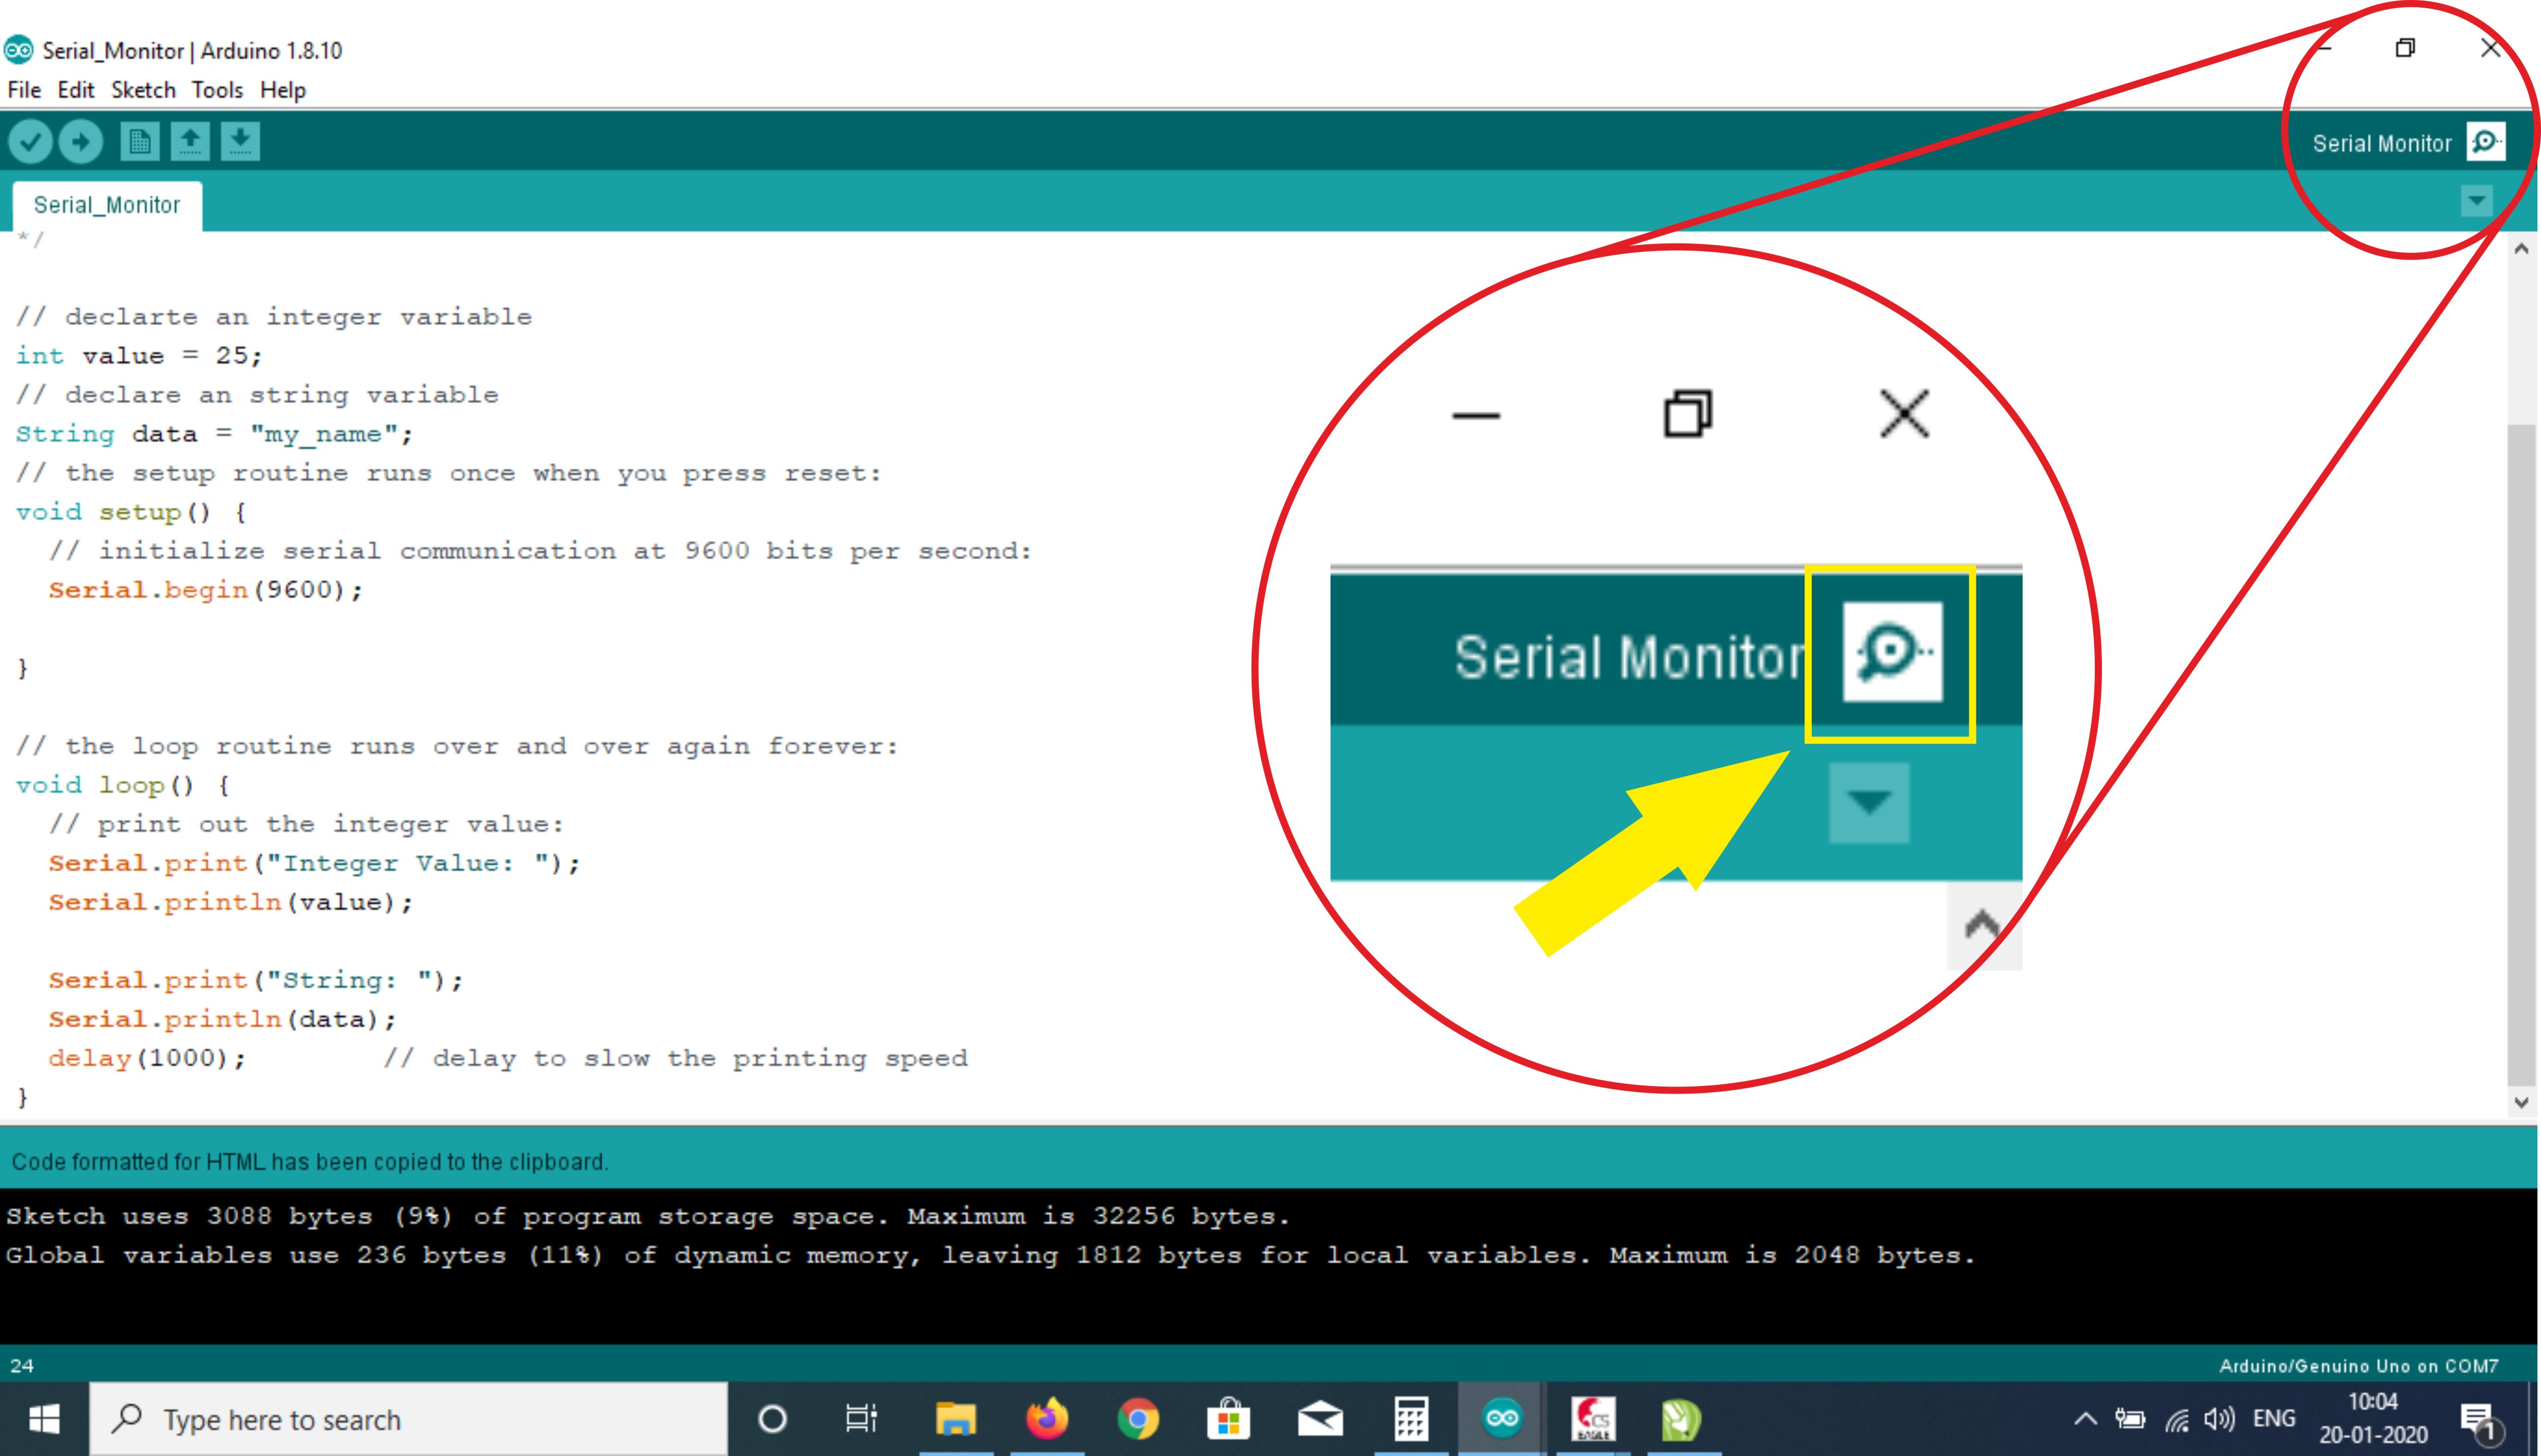
Step 4: Use the serial monitor
Once our code is running on the Arduino, we can use the serial monitor to see what's happening and talk to our code. This is a great way to debug our projects and make them even cooler.
That's it!
We're now ready to start building our own Arduino projects. There are lots of other things to learn, like choosing the right parts and wiring everything up, but this tutorial should have given us a good start. Have fun tinkering!